Showing posts with label Born Pretty. Show all posts

Sunday, 30 January 2011

Hello Kitty Funky French Nail Art thanks to Born Pretty

Here is another item that was sent to me for review from Born Pretty. It's their nail stamping image plate, M71, stamper & scraper.
Here is the mani I did.....How freaking cute is this!?!?1 You know what....I might actually leave this on all day! Yep, that's a record for me, lol.

Here is what I received. The stamper, scraper and the image plate


Most image plates have a very thin film that you might not even see. Just make sure to remove it.


and here is my nail stamping set-up, lol. I've taken control of one of our TV trays, can you tell. It works perfect though for stamping. Then I always make sure to have 100% acetone, my green coaster, for the cotton ball/pad soaked in acetone, image plate, stamper, scraper, and polishes I plan on using. Oh and after I took this pic, I decided to not use the Konad polish in white, but instead used black.


Grandpa, the pup, well 16 years young, we adopted a few months ago, just had to watch, lol.

Before I started stamping, I applied 2 coats my base coat of Brand 10, color #415, Pinky Promise


Now on to stamping. I used the flower image on the plate first, and used China Glaze Millenium for them. Then I used the cute Hello Kitty image, and Konad polish in black for that :)


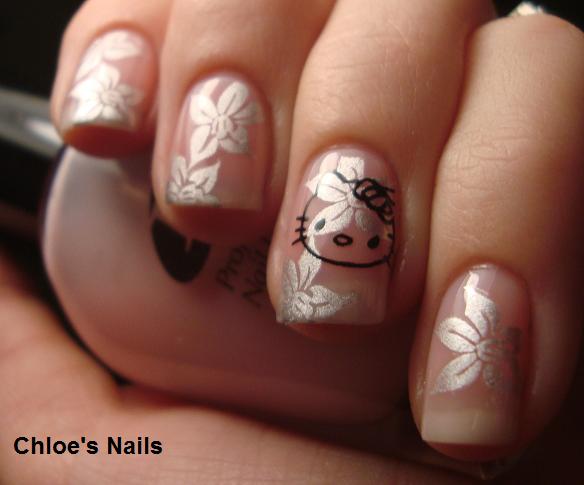
Finally I did my black tips with Sinful's Black on Black and added a tiny rhinestone to her bow :)


I LOVE this!! What do you guys think???

Also don't forget, if you plan on ordering from Born Pretty, don't forget to use my code: CHLOEK31 to receive 10% off.

Thursday, 27 January 2011

Kelier Black Crack Polish from Born Pretty

So Jessica from http://bornprettystore.com/, which btw, has some other amazing nail art items, sent me the Kelier Black Crackle Polish for me to review.
I will say that I had to play with it for a few minutes, to discover the best way to use this Crack polish, and here is what I learned. In order to get the effect I preferred, I needed my base coat to dry 100%. When it was, I applied a pretty thick coat of the Black Crack polish, and waited. Now unlike others I've tried, this one did take a smidge longer for the cracks to appear, but once they did, i loved it! Then I also learned that if you plan on using a top coat, WAIT. The Crack polish needs to be 100% dried. If it is not, when you apply it, it sort of fills in the cracks, and just looks like a plain old black polish.

Here was my final mani....Now I know this look isn't for everyone, but I'm a fan :P


The pic below is where I was playing in the beginning. My ring finger, 3rd finger, was the one that I let my base dry completely, and applied a thick coat of Crack polish over top, and also waited for the Crack Polish to dry 100%.

My pointer, middle & pinky, I also applied dry, but applied a VERY thin coat of Crack polish. This caused TONS of itty bitty cracks, which did look cool, but I preferred the fewer tad bigger cracks. Then you can kind of see how when I applied my top coat while the Crack polish was still semi wet, that some of the cracks vanished, and filled in. It was weird.


If you are interested in ordering from Born Pretty, use my code, CHLOEK31, and get 10% off from now till March 31st, 2011,