Saturday, 17 July 2010

How To: Kill your brand

Ginger + Liz send cease and desist notification: how to kill your brand

Lately there's been some rumbling in Beauty Bloggin paradise. More and more often companies do not agree with the content that has been posted on blogs and they start to prance around like a horse in heat. We've already seen a company that could not handle negative reviews (LimeCrime) and we've also experienced a brand that couldn't enjoy the free publicity that was being generated by an too early released press release.

This is not where the rumbling stops. Word on the street was that Diamond Cosmetics delivers to private labels. Diamond Cosmetics openly states they do this, I see no problems there.

But, let's say, you're a blogger. You don't want to palm off on your readers by recommending them an expensive version of a cheaper product. And this is where things can go wrong. Recently I politely declined the request of Elle.com to place an advertisement that included Priti Polish (another would-be private label of DC). It just wouldn't feel right. If I had any products of which I'd suspect that another brand's selling them for less money, I wouldn't hesitate to ask myself what's the deal.

This is exactly what Sara from Daily Polish did. Sara reviewed some products (she bought herself) by Ginger + Liz and she and her readers noticed these were similar to the ones by Diamond Cosmetics. When her readers requested some comparisons of the two brands, she went ahead and provided these.

A few posts later and Sara is being threatened with a $200.000 lawsuit. This kind notice was left through the attorney of Ginger + Liz. All posts and comments concerning this matter must be taken offline if she wants to stay out of trouble. Funnily enough Sara isn't the only one who ever questioned this en publique.

Of course it's common sense and decency to not totally destroy a company without grounded facts. There's a thin line between opinion and stating facts. But wondering things, since when is that not allowed?

Ginger + Liz, Ginger and Liz, lawsuit, Diamond Cosmetics, cease and desist, controversy, private label

And now what?

Is blogging as we know it indeed well and truly over? Is it asking for trouble when you're just voicing the ideas and opinions you have? Isn't this what blogging is about? An honest judgement coming from someone just like you? And what do actions like these say about a company?

The one thing I now know for sure, is that I've lost all interest in this brand. Whoops, are they going to sue me now?

- ETA: I've read some comments on another blog from Sara that could've been looked at as questionable, however, I still think the C&D is an overreaction.

Ginger + Liz, Ginger and Liz, Diamond Cosmetics, Cease and Desist, Controversy, private label

A Sparkle in My Eye


Today was 112°F here in Las Vegas, and I felt like I was melting even INDOORS with air conditioning. I saw a wonderful gradient on Michelle of All Lacquered Up's blog. She used one off the butterLONDON jellies layered 4 times to create a pretty effect. I loved the effect of the jelly layering so much, I decided to do my own- I used a polish that took about 5 layers to be opaque, and I think it worked perfectly for this effect.


I used Nicole by OPI Respect the World Matte as a base, with Confetti My Favorite Martian sponged over it in three layers. Topped it all off with 2 coats of Seche Vite top coat.

How To: Photograph your nails

How To photograph your nails swatches

Hello everyone! This topic may not interest all of you, but since people have been asking me to do this for ages, I figured, why not? I'm not saying my pictures are perfect, but taking nice crisp photos isn't all that hard, even if you don't own a big ass fancy $$$ camera!

1

Type of camera

I actually use two cameras, no real reason, I generally pick the one that is the closest, I'm lazy ha! The cameras I'm using are a Canon Ixus 75 and a Sony CyberShot w120. These are just simple compact cameras that don't cost a fortune at all. The first is a 7.1 megapixel camera and the Sony has 7.2 megapixels. Megapixels usually don't say a lot, the lens is what's really important. Therefore I wouldn't recommend taking pics with a mobile phone.

2

Light & Location

A lot of people think I shoot my pics in a light box, but I don't. I do have a selfmade one, but that one is too crappy to be even looked at! I prefer good daylight, on gloomy days I don't swatch at all. I take my pictures in front of a window, so all the neighbors must think I'm crazy by now.
Just play around with how the light falls on your hand, just take a couple of shots in different angles and find out what you like. Also be careful with reflection, if there's too much just pick another angle to shoot from.

3

Background

I like my backgrounds to be calm and quiet, so I use a colored piece of paper as a backdrop. Of course you don't have to do this, just make sure you don't have a lot of clutter in the background. It can be a little bit distracting at times.
No one's really interested in seeing your dirty laundry, your ashtrays full of cigarettes or your kitty taking a dump (I've seen it happen...). I do love seeing beautiful flowers, sand, sea, anything pretty and creative.

4

Sassy Settings

Now you're all set. There are a few settings I adjust and those are the Macro and the ISO values. The macro setting (iconized as a flower) allows you to take really sharp photos closeby. The ISO setting controls how sensitive the image sensor is to light. The higher the ISO the less light you'll need to take a photo. The higher the ISO, more speckled your pics will be. So you may have guessed this, I like to set the ISO low, around 100, or 200. If you have good lighting and a steady hand, this should be fine. If not, use a tripod and you won't end up with blurry pics.


I have to admit, I don't know a lot about white balance. White balancing is telling the camera what combination of red, green, and blue light it should perceive as pure white, given the current lighting conditions. Knowing that, the camera then accurately reproduces the other colors.
Usually my camera picks up colors just fine just using the auto preset. If your colors come out wrong, just try some of the white balancing presets to figure out which one is working for you.


I hope this post was helpful, thanks for stopping by!
- Michèle

It's Alive!

Mijn laatste blogpost is al een tijdje geleden maar ik ben niet toegekomen aan bloggen doordat ik druk was met tentamens en de nieuwe pup. Maar het is zomervakantie nu dus ik heb tijd om het in te halen. Bedankt dat jullie toch zijn blijven plakken!

Ik heb niet van alle NOTD's van de laatste tijd foto's kunnen maken maar ik heb er wel een aantal voor jullie.

It has been a while since my last blogpost but I just didn't get around to it with finals and the new puppy. But it's summer vacation no so I'll have time to catch up. thank you so much for sticking around everyone!

I haven't been able to photograph every NOTD lately but I do have a couple for you.


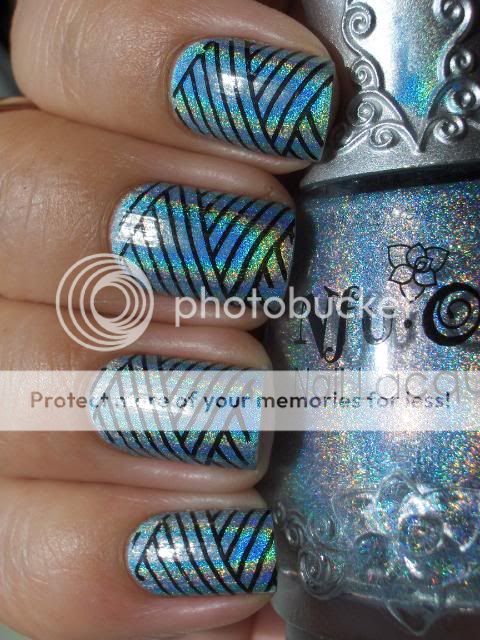
Laat ik maar beginnen met mijn NOTD van vandaag. Ik heb mijn nagels kort gevijld en ik vind het eigenlijk wel mooi dus ik denk dat ik ze een tijdje zo houd. Het voordeel is ook dat de Konad full-nail plates nu op bijna al mijn nagels passen behalve mijn ringvingernagel maar de ruimte die overblijft is klein dus dat vind ik niet erg.

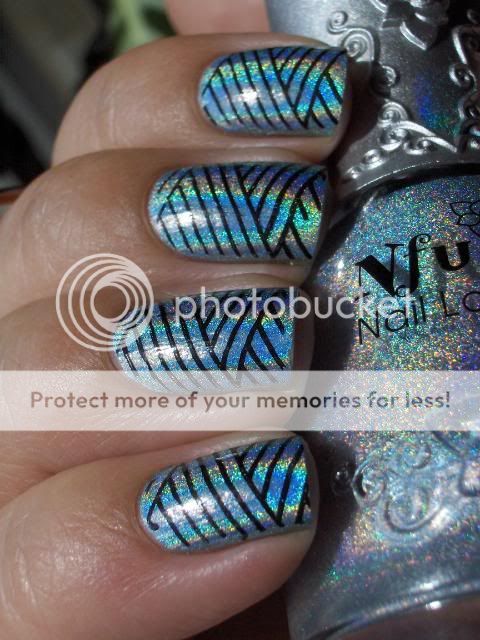
Ik heb Nfu Oh #65 gebruikt met Konad plate S06 en Wet 'n Wild Black Creme voor het stempelen.

Let's start with my NOTD from today. I filed my nails down to nubbins and I actually like the style so I think I'll keep them this way for a while. The good thing about this is the Konad full-nail plates will actually fit all my nails except my ringfinger nails now, but the remaining gap on my ringfinger nail is so small it doesn't bother me.


I used Nfu Oh #65,Konad plate S06 and Wet 'n Wild Black Creme for stamping. 


Nfu Of maakt de beste holo's! Ze zijn belachelijk schitterend, glanzend en makkelijk om mee te werken, daarnaast zijn de flesjes prachtig. Als ik een snelle zomerse manicure wil grijp ik altijd naar de Nfu Oh holo's omdat ze zo snel drogen. Het zijn eigenlijk matte lakken maar omdat de holo zo enorm sterk is valt dat haast niet op.

Nfu Oh makes the best holo's! They are insanely sparkly, shiny and easy to work with plus the bottles are beautiful. If I need a quick summery manicure I always grab for the Nfu Oh holo's because they dry so fast. They are actually matte but it's hardly noticeable because of the insane holo shine.


En dan nu de reden dat ik weinig foto's heb kunnen posten...

And now the reason I couldn't post as much...


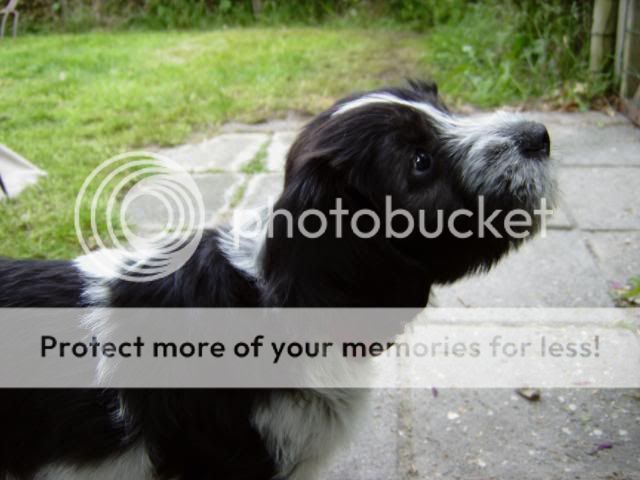
Ziet er onschuldig uit hè?

Looks innocent right?


Fout! Het is een nagellak-etend monster! Ik weet niet meer welke lak de eerste was maar het heeft het maar een paar uur gered. De tweede foto is Color Club Wild At Heart.

Wrong! It's a nailpolish eating monster! I can't remember what polish the first one was but I know it didn't last more than a couple of hours. The second pic is Color Club Wild At Heart.


En hij vind het leuk om me te helpen om swap pakketjes uit te pakken.

And he likes to help me unpack swap packages.


Maar dan gaat hij weer nagellak jatten...

But then he goes and steals polish....


Op mijn nagels zit hier OPI Who The Shrek Are You?

My nails are painted with OPI Who The Shrek Are You?


Maar hij kan ook lief zijn...

But he can be sweet...


Dat was het weer voor vandaag. Bedankt voor het kijken en ik beloof dat ik jullie niet weer zo lang zal laten wachten!

That is it for today. Thanks for looking and I promise I won't keep you waiting this long again!

Friday, 16 July 2010

Jerry Garcia in a Pouch, Man!


...and it won't even cost $400!!

Today's nails were inspired by the Grateful Dead bears! :) Gotta love them in their colorful goodness, so I thought they'd make fun nail art!!

Tonight I had dinner with an old friend from Michigan who was in town, it was good to see someone familiar, and to catch up on the last 2 years! :) Plus we ate at le Burger Brasserie, where the burgers are killer (le paris for me- caramelized onion bun, caramelized onions, melted brie, and smoked bacon, all atop a half lb. burger. *drool*

Anyway, to the nails.


I used Sally Hansen Professional Lavender Cloud as a base, with Pure Ice French Kiss mixed with Orly Gumdrop for the blue bear, and highlighted with Orly Gumdrop as well. For the neck, I used For the green bear I used L.A. Girl Army Green, highlighted with CND Bicycle Yellow, and a mixture of China Glaze Salsa and American Apparel Manila for the neck. For the yellow bear, I used American Apparel Manila, highlighted with American Apparel Cotton, and Pure Ice French Kiss for the neck. For the red bear, I used China Glaze Salsa, highlighted with CND Bicycle Yellow, and L.A. Girl Army Green for the neck. For the purple bear, I used a mixture of China Glaze Salsa, Pure Ice French Kiss, and Sally Hansen Professional Lavender Cloud for the body, highlighted with Sally Hansen Professional Lavender Cloud, and Orly Gumdrop for the neck. Everything was outlined in American Apparel Hassid. Topped everything off with two coats of Seche Vite top coat.

Aqua Rose on Blue base

Hello my Sweet Nail -Art Lovers
What a wonderful time summer, i love it, even despite the heat :)
I love swimming outdoor and i swim everywhere lakes, reservoirs and pools - i love it. I really wish to move some day closer to the ocean, so i can have even more water to swim.
So here is my aqua manicure, i just got so inspired after jumping into the pool that came up with this mani. I know it is just a flower on a blue, but it really makes me feel like i got a splash of fresh cold water on my nails.I don't do much hand painting those days, due to the busy schedule, but i think this one turned out great. What do you think?


This is my right hand, i actually like it even more than left

200 POSTS!

Super cute toes and the picture actually turned out pretty good! Finally, it is soooo hard for me to take a good picture of toes. This is a glitter fade with glitter from Young nails in shock, pinkie, and sunshine. I painted tiger stripes on the top. Love these toes!

These are all colors from young nails that I marbled together and then I faded young nails hologram up into them.


This is gel polish. Happy Birthday Hannah!

Rescue Beauty Lounge - Scrangie

RBL Rescue Beauty Lounge - Scrangie

the yearning

Please meet one of the prettiest purples ever! As you might already know, Rescue Beauty Lounge released a blogger collection back in 2009. Bloggin queen Scrangie came up with this gorgeous color what she describes as a medium blue-based purple with green iridescence and green microshimmer. Of course it sold out. Of course I wanted it. Wait, wanted? I needed it! After watching some go on eBay for ridiculous prices, I just gave up.

But then! RBL decided to bring it back. Lucky me!

RBL Rescue Beauty Lounge - Scrangie

I need buckets of this stuff

In all honesty I think they changed the formula a bit in the second round, because I've ever heard a bad thing about this polish before. Could it be? I tried it on as soon as I got it, *with shakey hands from excitement*, and it just wouldn't dry and it started bubbling pretty bad. But, since it was a very hot and humid day, I decided to give it another go some other time.

Since we had some gloomy days around here, I figured it be a perfect time to cover my nails in this sauce of awesomeness again. Three layers later, it still bubbled a bit. But thankfully it dried and pretty quick at that! So, it may not be application heaven, I don't really care! The color is just too perfect, I'd paint EVERYTHING this color if I had gallons of the stuff. It stayed on 4 days without chipping, so that wasn't bad either.

RBL polishes cost 18 USD for 12ml and Scrangie is still available at the RBL website!

Well dear reader, this was it for today, thanks for stopping by and be safe!
- Michèle

Thursday, 15 July 2010

Off the Clock


Today's nails were inspired by a super awesome retro clock in the house that I'm house-sitting at. It sort of looks like a stylized sun, with the clock face and lines going out at all different lengths like rays.


I used L.A. Girl Army Green as a base, with Essie Mink Muffs for the brown designs, a mixture of China Glaze Salsa and Zoya Jancyn for the red design, then American Apparel Cotton for the dot in the center of the design on all nails. Topped it off with 2 coats of Seche Vite top coat.

Wednesday, 14 July 2010

Vive la France!


Today is Bastille Day, the celebration of the storming of the Bastille, a prison and fortress in Paris. Fun fact: there were only 7 prisoners when the Bastille was stormed. :) Reader Sonoma Bento suggested that I do a French/Bastille day themed manicure today, so here you have it, the French flag is on all nails but the ring finger, which is the Eiffel tower in the moonlight. :-P


I used Sally Hansen Professional Lavender Cloud as a base with Pure Ice French Kiss for the blue stripe of the flag, China Glaze Salsa for the red portion of the flag. For the ring finger, I used Color Club Naughtycal Navy as a base, which is awesome, it was almost opaque in 1 coat!! Better yet that I got it in the Yacht Club set, which was $7.99 for 6 colors plus basecoat!! Anyway, back to what I used. I used a mixture of American Apparel Cotton and American Apparel Manila for the moon and stars, and a mixture of American Apparel Cotton and American Apparel Hassid for the tower. Topped everything off with 2 coats of Seche Vite top coat.

I hope everyone enjoyed the celebrations!!