Friday, 17 December 2010

Take a Bough


Christmastime is upon us, and with a mere 7 days left, many of us are hustling around trying to finish up last minute gift shopping, attend parties, and finish up last-minute holiday decorating. Today's nail design was inspired by the cold winter days spent as a kid with my family picking out the 'perfect' tree. You know, the one that wasn't too tall or too short, too skinny or fat, and heaven forbid it be lopsided! Years have passed and my parents have since switched to artificial, and I've switched to none, unless you count the 2 foot tall one that resides on my desk at work. However, I'll always have fond memories of tree hunting, whether it was at the store or a Christmas tree farm, so this design makes me feel fuzzy on the inside. ;) Hope it evokes fond memories of Christmases past for you too!


I used FingerPaints Winter Wishes from the FingerPaints Winter Dreams collection as a base, LOVE this color- super sparkly champagne color that would also be perfection for New Years! For the tree boughs, I used American Apparel Raccoon for the branch and base for the cones, then Zoya Dea to highlight the cones. For the needles, I started with OPI Here Today, Aragon tomorrow, then used Zoya Envy, then Zoya Shawn, then BB Couture Poison Ivy, then Zoya Envy again to separate some of the needles. Everything was random, but I layered the colors like I did to add depth. Topped everything off with 2 coats of Seche Vite top coat.

Needle little Christmas?

Dorothy & Her Diamond Necklace......

I know I've done this combo before, but I love it!! Plus, I wanted to try another Konad design that I've never used. I always loved the double necklace image, but I'm AWFUL at lining any single image up! What they hey, though, I tried, and it came out pretty good. This is 2 coats of Dorothy Who over black and I used China Glaze Millenium for the necklaces. Then I just added a little rhinestone to make it a diamond necklace, lol. Hey, if I can't have one, my mani can :P


A Try on Pastel Colours


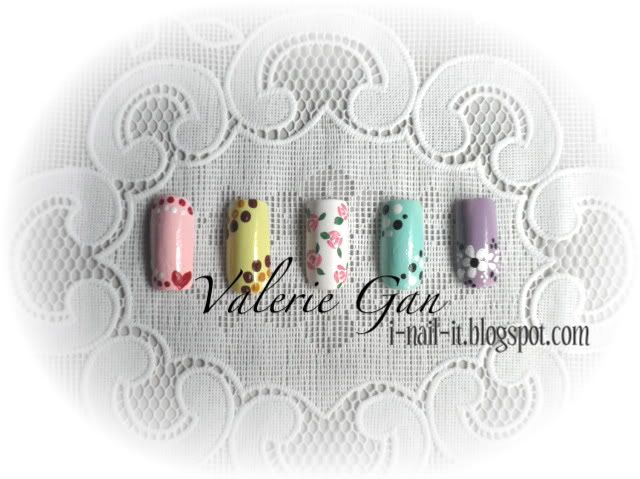
Bought some new pastel-coloured nail polishes the other day from The Face Shop. I hardly use light colours on myself, in fact I'm very accustomed to using dark colours with light decorations on top. However, I've come to realise that pastel colours are really sweet colours and they bright out a gentle look.

Starting from the left... ...

The heart looks pretty cute! This design reminds me a lot about relationships. Love was never meant to be perfect, just like how I didn't manage to paint the heart to perfection. But just as long as we never quit trying, things will get better. It's a simple design, but I like the combination of colours and how it reminds me of Valentine's day! (: The yellow design reminds me of batik painting! I saw this design online the other day and gave it a try. The design I saw used a brown base with yellow and orange dots. I don't have brown nail polish, so I swapped the colours around! A brown base will give out a more batik feel though. Will try it when I get brown nail polish! The middle design is my top voted design of the year! My first try at this design, but I really love it. It's a really sweet design. 100% handpainted ! I love this particular shade of green nail polish. More towards a pastel green. Did a simple design on this as I felt that the emphasis should be on the colour of the nail polish and not the design. The purple is something probably very similar to my past designs from the floral series.

All in all, a great day achieved ! (:

Christmas Collection


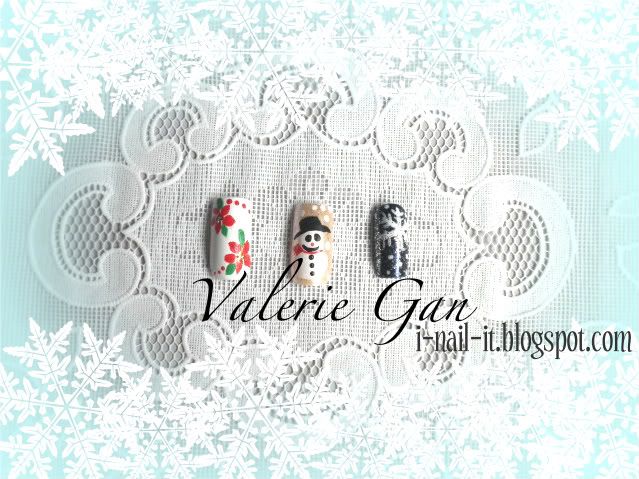
Found 3 designs I've done a while ago in preparation for Christmas. There are 2 more in my previous post as well. My personal favourite is the snowman! Find it really cute and I'd love to have it on my nails for Christmas ! Was actually pretty proud of the Poinsettia that I drew, only to realise after that the colours weren't really distinct because of the new acrylic paint I bought. It was just some regular acrylic paint that I got and I stopped using it after this experience. I believe with good quality paint plus some gold beads in the center, it'll definitely look stunning. (: Snowflakes looked better without the sparkles, but since I've already done it, might as well just upload it. You can opt not to have the sparkles!

Thursday, 16 December 2010

Sorry, my Darlings...

My sincerest apologies for the lack of posting yesterday and today.

Last night, I fell asleep shortly after I got home and took a shower. I got into bed to get warm, and ending up zonking out until this morning. Lights on, TV on, everything left on downstairs.... Yeah. COMA.

Anyway, that brings us to today. Today I worked my full-time job from 8a-5p, then hauled my butt to my second part-time job to work from 5:30p-11:30p. What this means to you is that there won't be any nails until tomorrow, since I won't even get home before midnight.

I hope that you'll forgive me, and come back to the blog! :) (2 days isn't TOO bad in the scheme of things, right??!)

Anyway. I DOUBLE pinky-swear that I'll have nails up tomorrow. Scouts honor. (I totally made it to Brownie status...wait...that's only the first level of Girl Scout isn't it? Whatever, I sold the cookies.)

2-day old nail design hugs to you all,

-M

Revlon PrisMagics.......

Sorry it took me FOREVER to post these 2 Revlons :(  I have just had so many other manis I wanted to share, but here they are!!  Levitate & Potion. These 2 are from the same collection as these were,
Magical & Crystal Ball. I even contacted Revlon, to get some info on this collection. I searched the internet, and couldn't even find the Collection name, let alone when they were released! The lovely Customer Service Rep got back to my email in a few days. So This collection was called PrisMagics and was released in 2003.

This is Levitate


Potion

A few WTF moments from Lil Ol' Me!!

Okay, so I'll admit, I don't always have the best ideas for manis, lol. I decided I should just let it all out, and share them with you guys. Now.... 1 rule.....NO LAUGHING! I think I will lie, and blame these ideas on my hubby, lol. Yep....it was all his fault. Now I know, these aren't absolutely horrible, it's just the color combos that makes me hang my head.

I am soooooo sorry, but I don't even remember what the black glitter base was that I used for this, but the pink is Sinful's Cream Pink, which I love. I used tape for the pink part. I just took 2 pieces of scotch tape, per nail, and cut the designs out.


This was China Glaze's White on White and OPI's Simmer & Shimmer


This mani was done with the same previous colors. Can you tell I was determined to make this combo work, lol


Now this was done with a base of 10, #415, China Glaze Millenium for the polka dots and a new polish that I ordered off of eBay, that I will post about tomorrow. Just a heads up, the aroma.....deadly!!!

Wednesday, 15 December 2010

Virgin try on acrylic flowers!


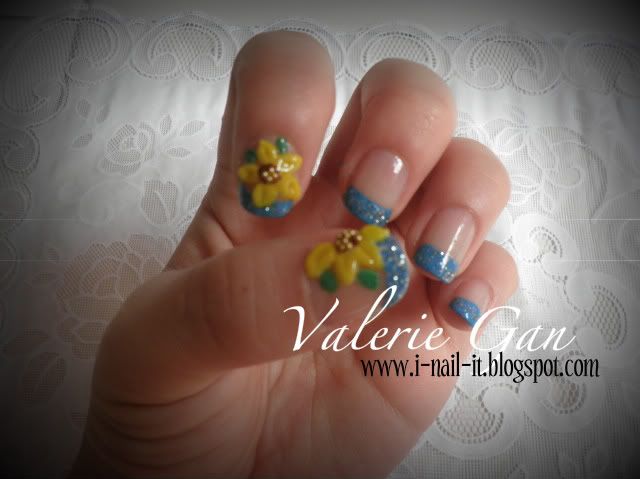
As the title suggests, I did my virgin try on acrylic flowers! It really isn't as easy as those videos I see from YouTube. It's not perfect either, and I know there's a lot of room for improvement. But at the end of the day, I felt proud of myself as this design is very different from my usual style. I'd always go for dark colours and white flowers or something along that more sophisticated look. This design is more towards the cute side, gives a summer feeling with the bright colours. Some may feel it's too cute, or too bright. To each its own. (: Most importantly, I think it's a good first try !!

A Night of Tears and Tantrums *stomps feet*

Okay, so last night I *takes deep breath* broke my middle fingernail on my left hand, MY PICTURE TAKING HAND!!! I was racing my daughter to the car, grabbed the door handle....and SNAP, off went th top half of my middle fingernail and the corner of my index, which I can deal with that one. I literally stood there whining and staring at it!! That's my, well trained, pro posing MANI HAND!!!!! Well, having the BEST hubby in the world, he ran me to Target to get some fakes, all his idea!! I was not about to file them all down to that length! He actually picked out a set, because I was still in my whining 6 year old mode, lol.

Well here is the set he grabbed

And this is the nail massacre, the horror.....(too dramatic?, lol) Sorry for the cell pic, it's all I had near me last night


I wasn't even thinking of taking pics to show the process, sorry, till it was a little late. Anyways, this is the fake nail on and filed down to the shape I like. You can also see the corner broken off my index finger :(  I had already started my mani, that's why my ring finger is painted already, ooops.


Well, here it s all done. I just did a quick coat of black, to see how it would look, and THANK GOODNESS it came out looking great!! Whew.
I just wanted to share with you all, and maybe help a fellow friend if you are ever in this horrible position.


Sorry for the screaming, but I was really upset when it happened :P

The Black Widow....

Now, I'm not 100% sure what made me come up with this, and it would have been great for Halloween, but it's still fun now :P It's just back and Milani Red Sparkle. Thank goodness these are core, cause I LOVE this red!!!


This is how it started....with an edgier version of the half moon mani :P I polished my nails black, then added a coat of SV. I then taped them off, and painted the red triangles next  to my cuticles, like so. Then one more coat of SV.


Then after they were mostly dry, I taped off my tips and painted them red : P