Showing posts with label Allergies. Show all posts

Tuesday, 23 February 2010

Tips And Tricks: How To Repair a Broken Nail

Het is ons allemaal wel eens gebeurt: je nagels zijn net op een lengte die je mooi vindt en dan scheurt of breekt een van je nagels. Je kunt de gescheurde nagel afknippen en al je nagels kort vijlen maar als de nagel er niet volledig af is dan kan je ook proberen om hem te repareren.

It happens to us all: your nails are finally at your desired length and then one of them breaks or tears. You can cut the broken nail off and file all your nails short but if the nail is still somewhat attached you could also try to repair it.


Dit zijn de benodigdheden om een gescheurde of gebroken nagel te repareren:

These are the things you need to fix a broken nail:


  • Nagellijm (neem er een met een kwastje)
  • Silk Wraps (Dit zijn voorgevormde en zelfklevende maar je kunt dit ook per velletje kopen en zelf op maat knippen)
  • Een houten bokkepootje
  • Een pincet
  • Een nagelvijl
  • Bufferblok (Ik vind deze fijn maar een andere vier- of zesvoudige buffer zal ook wel werken)
  • Schaar (Staat niet op de foto)
Heb je een gebroken nagel maar geen silk wraps in huis? Deze methode werkt ook met een theezakje! De papieren variant werkt redelijk maar houdt wel minder lang maar de piramidezakjes werken net zo goed als een echte silk wrap!

  • Nail glue (preferably a brush on glue)
  • Silk Wraps (These are pre-cut and self-adhesive but you can also buy this as a sheet and cut them to size yourself)
  • An orange stick
  • Tweezers
  • A nail file
  • Buffer block (I prefer this one but any four or six-way buffer should work)
  • Scissors (Not in the picture)
Do you have a broken nail but no silk wraps? This method also works with tea bags! The paper kind works fairly well but won't hold as long, the pyramid bags work just as well as real silk wraps!

De eerste stap is om voorzichtig de oude nagellak zoveel mogelijk te verwijderen.

The first step is to remove as much of the old polish as possible.


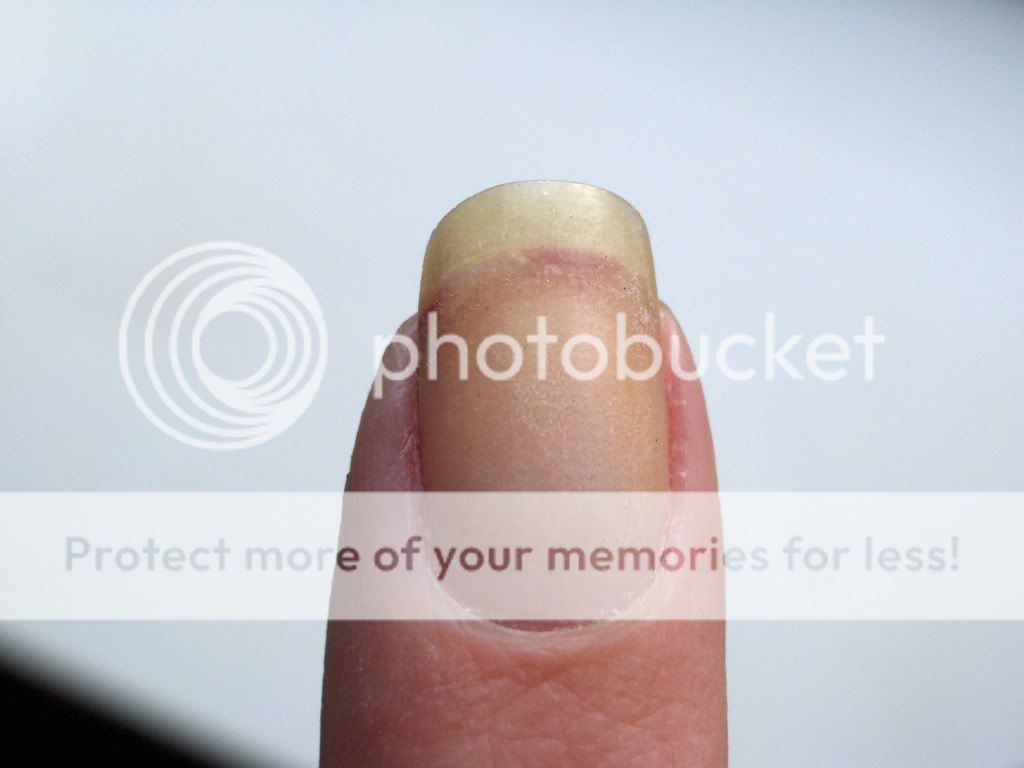
Dit is mijn zielige gescheurde rechterwijsvinger. De nagel is tot 3/4 ingescheurd.
Omdat dit een erge scheur is heb ik eerst een klein beetje nagellijm aan de linkerkant in de scheur gedaan zodat mijn nagel zijn vorm kan behouden terwijl ik de verdere reparatie doe maar bij kleinere scheurtjes is dit niet nodig. Nadat ik het drupje lijm in de breuk heb gedaan heb ik met het houten bokkepootje de delen van mijn nagel op elkaar gedrukt tot de lijm droog genoeg was om het op zijn plek te houden.

This is my poor torn right index nail. The nail is torn 3/4 of the way.
Because this is a bad tear I put a little bit op nail glue on the left of the tear so the nail can keep it's shape while I do my repair but you don't need to do this for smaller tears. After I put the glue in the tear I used an orange stick to keep both parts of my nail together until the glue was dry enough to hold on it's own.


Daarna haal je de achterkant van de silk wrap en plak je deze over de gehele nagel waarbij je een 'gap' vrijlaat bij je nagelriemen. Ik gebruik hierbij een pincet omdat ik niet teveel aan de plakkant van de wrap wil komen met mijn vingers.

Then you peel off the back of the silk wrap and stick the silk wrap over your entire nail but leaving a gap at the cuticle. I use tweezers for this because I don't want to touch the sticky side of the wrap with my fingers.


Knip voorzichtig de wrap met een schaar op maat zonder in je eigen nagel te knippen.

Carefully cut the wrap to size with scissors without cutting your natural nail.


Breng nu een laagje nagellijm aan over de gehele silk wrap waarbij je ook weer een kleine 'gap' vrijhoudt bij je nagelriemen om te voorkomen dat je de nagel aan je huid vast plakt. Naast het feit dat het onprettig voelt kan er dan lucht onder de wrap komen en in die ruimte kunnen nare bacteriën en schimmels gaan groeien. Als er wel lucht onder de wrap komt na een paar dagen, week deze er dan volledig af en vervang hem voor een nieuwe.

Now you can put a coat of nail glue over the entire silk wrap leaving a gap near the cuticle to prevent glueing your nail to your skin. That wouldn't only be uncomfortable but it can also cause air to get under the wrap which can cause nasty bacteria and fungals to grow under the wrap. If you do get air bubbles under the wrap after a few days just soak off the wrap completely and apply a new one.


Als de lijm volledig droog is kan je een tweede laagje nagellijm aanbrengen. Laat ook deze weer goed drogen. Bij ernstige breuken zoals de mijne zou je vervolgens een tweede silk wrap aan kunnen brengen met nog twee laagjes lijm.

After the glue has dried completely you can put on a second coat. Let this dry completely too. With serious breaks like mine you could to a second wrap and two more coats of glue.

foto gebuft

Als de lijm goed droog is (het droogt mat) pak je je buffer en vijl je voorzichtig je nagel glad. Let op dat je niet door de silk wrap buffert maar vijl alleen oneffenheden weg.
When the glue is completely dry (it dries matte) you take out your buffer and gently file your nail smooth. Be careful not to file through the silk wrap and only file away the uneven parts.

Vijl met een normale vijl ook de overstekende stukjes van de wrap glad.

Use a regular file to file away any pieces of silk wrap that extend past the free edge.


Je nagel is gerepareerd en klaar voor nagellak!

Your nail is fixed and ready for polish!


Afhankelijk van welke remover je gebruikt kan zo'n reparatie tot zelfs drie weken blijven zitten.
Ik ben zelf allergisch voor acetonvrije remover en ik lak mijn nagels vaak dus bij mij blijft dit niet heel erg lang zitten maar door af en toe een nieuw laagje lijm aan te brengen kan ik dat nog wel rekken tot ongeveer anderhalf á twee weken. Niet slecht voor iemand die bijna dagelijks lakt toch? Gebruik je acetonvrije remover en lak je je nagels minder vaak dan zou de wrap moeten kunnen blijven zitten tot de breuk volledig is uitgegroeid.

Depending on what remover you use this wrap can hold up for up to three weeks. I am allergic to acetone-free remover and I polish my nails a lot so mine won't stay on that long but with an extra coat of glue every now and then I can stretch it to about a week and a half or two weeks. Not bad for someone who polishes almost daily is it? If you use acetone-free remover and don't polish your nails this much the wrap should be able to hold until the break has grown out.

Om de wrap te verwijderen gebruik je dezelfde methode als voor glitternagellak. Doe een beetje pure aceton op een watje of stukje vilt, leg dit op je nagel, pak je vingertop in met aluminiumfolie en laat een paar minuutjes zitten. Daarna veeg je zonder problemen de gehele wrap in een beweging van je nagel.

To remove the wrap you can use the same method as I use for glitter nail polish. Soak a cottonpad or piece of felt in pure acetone, put it on your nail and wrap your fingertip in tin foil and leave it for a couple of minutes. Then you can just swipe the whole thing off in one clean swipe.

Tuesday, 29 December 2009

[From The Vault] My Very First NOTD!


Ik heb een mega-allergische reactie nadat ik een klein allergietestje heb gedaan dus ik wil de komende dagen even alles wat irriterend kan zijn vermijden tot de medicijnen werken. Geen nagellakremover en nagellak de komende dagen dus.

Ik wil toch iets posten dus ik laat jullie mijn allereerste NOTD foto zien die ik gemaakt heb voor het nagellaktopic op www.fok.nl Niet slecht voor een eerste foto al zeg ik het zelf!
Een funky french met twee laagjes Rimmel Jaded Glamour en een laagje Essence Bubblegum.

Ik hoop snel weer terug te zijn!

English: I'm having a major allergic reaction after doing a little allergy test so I'm going to try and stay away from anything that might irritate my skind for a couple of days until the meds kick in.

I did want to post something so I'm going to show you my very first NOTD pic that I made for the nailpolish topic on www.fok.nl Not bad for a first pic if I say so myself!
A funky french with two coats of Rimmel Jaded Glamour and one coat of Essence Bubblegum.

I hope to be back soon!


Monday, 21 December 2009

Allergies And Why Artificial Nails Are Not Bad For Your Nails!

Ik heb een paar maanden geleden een thuis-setje gel nagels besteld bij Nail Design Euro Discount zelf een klein laagje gel over mijn nagels te kunnen maken als versteviging en dat beviel heel erg goed! Tot ik er allergisch op ging reageren...

Ik heb dus een paar weken geleden de gel er vanaf gevijld en heb nu dat bijna helemaal is uitgegroeid een doe-het-zelf allergietest gedaan door van alle producten die ik gebruik wat op mijn onderarm te smeren en dan te kijken wat de boosdoener was. Na 20 uur geen enkele reactie!

Toen ik die gel op mijn nagels had gebruikte ik acetonvrije remover en ik heb inmiddels ontdekt dat ik daar allergisch voor ben dus na mijn allergietestje dacht ik dat de gels onschuldig waren.

Gisteravond heb ik dus gelijk weer een dun laagje gel over mijn nagels gedaan want in de winter kunnen ze die extra stevigheid zeker wel gebruiken. Helaas werd ik vanmorgen weer wakker met jeukende vingers en een vol hoofd. Ik ben dus nu de gel er weer af aan het vijlen.

Ik heb vandaag dus een gel besteld die geschikt zou moeten zijn voor mensen met allergiën en dat ga ik dus binnenkort testen. Ik houd jullie op de hoogte!

Nu we het toch over kunstnagels en overlays hebben wil ik gelijk een fabeltje uit de wereld helpen. Kunstnagels zijn NIET schadelijk voor je nagels! Om kunstnagels aan te brengen worden je eigen nagels een klein beetje opgeruwd omdat de gel of acryl anders niet goed pakt. Dat is het enige wat je nagel een klein beetje zwakker maakt simpelweg omdat ze dus een fractie dunner worden maar dat groeit na verloop van tijd gewoon uit. Nagels hoeven niet te ademen want het is dood materiaal en ze gaan ook niet rotten onder de kunstnagel.

Wat slecht is voor je nagels zijn slechte luie nagelstylisten die met een soort dremel je eigen nagel opruwen en kunstnagels verwijderen door er een gleuf in te vijlen en dan de beide kanten er vanaf trekken of die de gel of acryl niet zodanig zetten dat het goed hecht aan je nagel. Als er opstaande randjes of luchtbubbels zijn kan er vocht onder de nagel komen waardoor je schimmel kunt krijgen. Een andere oorzaak van schimmel is als de nagelstylist niet schoon genoeg werkt.

Laat nooit iemand met een electrische vijl in de buurt van je eigen nagels en als de gel of acryl lift en er luchtbubbels ontstaan onder de nagel ga dan direct terug om erger te voorkomen.
En wil je van je kunstnagels af laat deze er van af vijlen of weken in aceton en ga er niet zelf aan trekken. Houd je die richtlijnen in acht dan is er helemaal niets mis met kunstnagels.

Nu ben ik natuurlijk geen professional en ik ben dus niet zo snel met vijlen dus daar gaat voor mij nogal wat tijd in zitten. De foto's van de play date laten dus even op zich wachten maar ik beloof dat ze komen!


English: A couple of months ago I ordered a DIY gel kit from Nail Design Euro Discount so I could to a thin gel overlay on my nails to make them stronger and I loved it! Until I got an allergic reaction...

So a couple of weeks ago I filed most of the gel off and now that the rest had almost grown out I did a DIY home allergy test by putting some of all the products I use on the inside of my arm to see which product was the culprit. After 20 hours I got no reaction!

While I did gel overlays I used a non-acetone remover and I had discovered I was allergic to that so after my test I thought the gels were innocent.

So last night I busted out the gel kit and put an overlay on my nails because they can sure use the extra sturdiness in the winter. Unfortunately this morning I woke up with itchy fingers and a full head so now I'm filing of the gels again.

Today I ordered a gel that should be suitable for people with allergies so I'll be trying that soon. I'll keep you all posted!

While we are on the subject of artificial nails and overlays I would like to take the opportunity to get something out of the way. Artificial nails are NOT bad for your nails! To apply artificial nails to your nail your natural nails will be buffed a little to create a rough surface for the gel or acrylic to hang on to. That is the only thing that makes your nails a little weaker simply because they will be a bit thinner but that will grow out. Nails do not need to breath because it's dead material and your natural nails will not rot under the artificial nail.

What is bad for your nails are bad and lazy nail stylists who use a sort of dremel on your own nail and who remove artificial nails by filing a ridge in the nail and pulling the artificial nail off or who don't attach the nail properly to the natural nail. When you have ridges standing up on the sides or air bubbles moisture can get trapped onder the nail and cause mould. Another cause of mould is when a nail stylist doesn't work clean enough.

Never let anyone near your natural nails with an electric file and if the gel of acrylics are lifting or air bubbles form under the nail go back to the tech immediately to prevent worse.
And if you want to get rid of your artificials go back to get them filed off or soaked off with acetone and don't pull them off yourself. Keep those guidelines in your mind and there is nothing wrong with artificial nails.

Of course I'm not a professional so I'm not as fast filing off my nails so the pictures of the play date will have to wait for a bit but I promiss I'll post them!