Hello!
I've revamped this website a little. Look towards your left <-- and you'll see several new links below I-Nail-It's logo. Thought that might be easier for everyone to navigate. I have added in new services as well, such as the OPI mani/pedi. Do take a look! There are also items for sale. Will be starting work on Monday, so I'll only be able to take in appointments on certain weekday nights or weekends. (:
Tuesday, 25 January 2011
American Apparel INFO
Since there has been a lot of concern recently about the American Apparel polishes, so I contacted American Apparel, and here's what I found out:
"American Apparel set out to produce this nail lacquer collection with a Made in USA company, and our deep affection for this family-owned corporation was a motivating factor in our decision to work with Forsythe. But one thing we value even more is the safety and health of our customers. This is why American Apparel paid for the costly international recall out of its own pocket, even trading one old bottle for two new bottles of polish to all customers, immediately after we discovered problems with the packaging. We wish no ill-will towards this fellow American manufacturer, but need to seek a fair and accountable solution to this incident."
Hope that calms some concerns. No 'exploding' nail polishes. :)
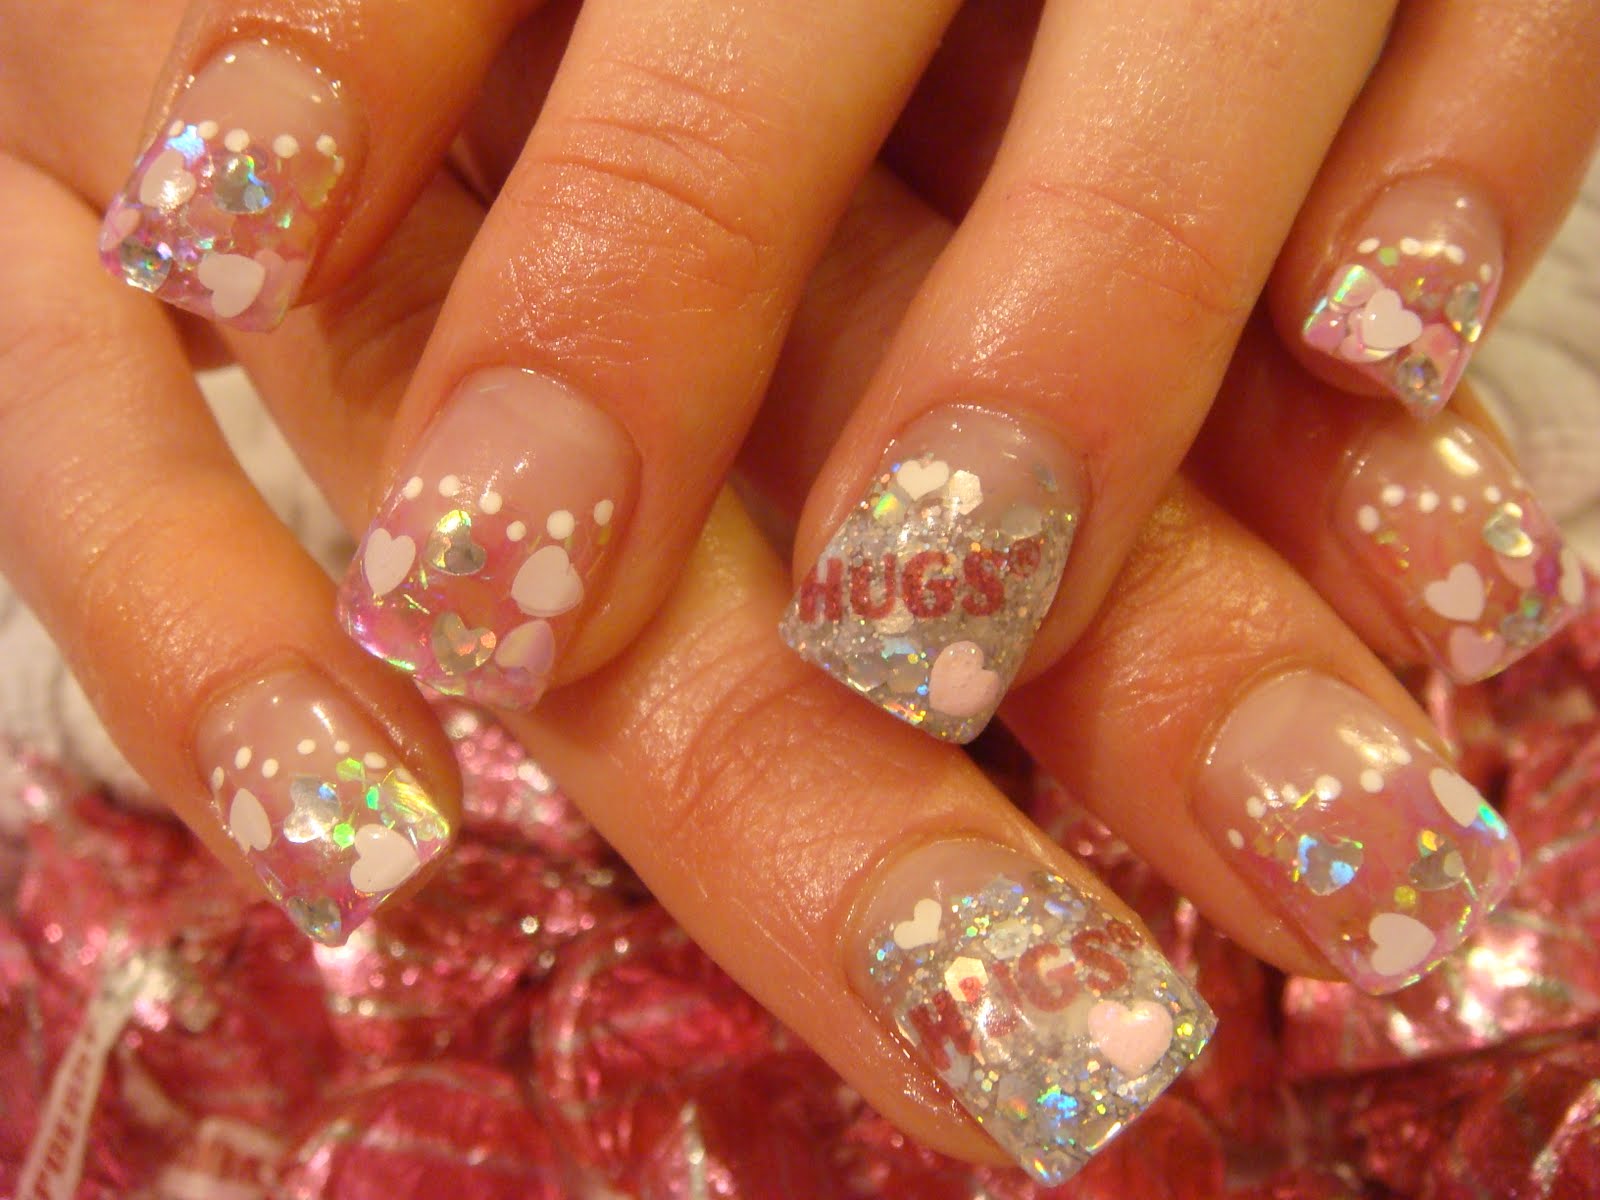
China Glaze Pom Pom
So as we all can see, my middle finger nub SUCKS! Since I decided to leave it alone and just let it grow out on it's own, I ran to Sally's to pick up Gelous. I've heard quit a bit of talk about it on MUA, and decided to give it a try on my middle finger, just to keep it strong, in the grow out process. My nails are normally really strong, but this is the 2nd break to it in like a month and a half. The first time was a car door, and this time just slammed it in a normal door. Anyways, I just felt the need to baby it, as it grew, lol. I've also started taking Biotin again, to help speed up the process. Okay well, while I was st Sally's I saw this China Glaze Pom Pom. It just called my name, and I knew I had to layer it over a black. It's such a pretty pink glitter, with larger silver glitter in it as well. Then as you will see, Scotch tape had to get involved, lol.


Oh and YAYAYAYAY, my OPI Black Shatter arrives tonight!!! What shall I layer it over? Any ideas, anything you guys wanted to see?
1 more thing. I wanted to share a cute polish pic, that was posted on MUA. I found the artist, and just love his work. Here is his pic....(not mine, not aff.)

Hahahahaha, I just fell in love.
The artist is Terry Border from Bent Objects. You can see more of his fun unique art HERE. I'm just such a sucker for funny things like this.
Monday, 24 January 2011
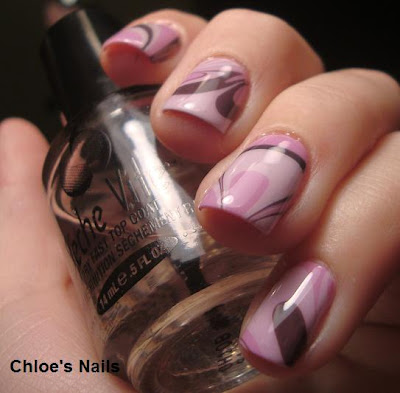
Water Marble Picture Tutorial
Okay, so since I had quit a few requests to do a tutorial on how I do my water marbling, here it is. I start with filtered water, and since ours is refrigerated, I heat it up for a about 20 sec. in the microwave, just to make it room temp. I use a throw away coffee cup that I have cut in half. Here are my basic supplies. Oh just so you all know, this is with my sad, pathetic broken middle finger. I know it looks awful, and I'm sorry, but I have decided to just let it be, and hope it grows out soon.Okay anyways, for this mani I used Sally Hansen Gray Area, OPI Lucky Lucky Lavender and China Glaze White on White.


I first did a base of the OPI (sorry about the poor lighting, where I do this, it's not near a direct light source)

When I start, I make sure all the lids are off. Here I just dropped in a blob of my first color, Gray Area, and you can see it spreads.

Then I dropped in a blob of White on White, right in the center of the Gray Area

and dropped in a blob of the OPI

I repeated the 3 colors again, until I was happy with how it looked.

Then using my pencil, I lightly drag the polish into designs in the cup

This is what it looked like, when I stopped, and I liked the designs I had.

I tape each finger, using 3 pieces of tape.

Then you pick which part of the design you made, you want on your nail.

and dip your nail into it, at an angle.

Once you have fully dipped your nail, I take my pencil, and with my nail still in the water, swipe it around my nail, and this picks up all the excess polish, so you don't ruin your nail, when you remove it from the water.

I then remove the tape, and do the rest the same way, re-doing the polish dipping and all. This is what I ended up with.

Then using some nail Q-tips, I clean up the excess polish from around my nail with 100% pure acetone.

Here is my mess, when I'm all done, lol

Then once all fingers are cleaned up, and my top coat has been applied, this is my final mani :)


I really hope this helps you guys :P
Sunday, 23 January 2011
Stamping with Sally....
Good morning ladies!! This is a mani I did last week, pre-break, I'm still so mad, lol. For this I used Sinful's Black on Black for the base, and a Sally Hansen Color Quick Chrome polish pen, in Turquoise Chrome, for the image. I used the Bundle Monster plate BM20. These Sally Chrome polish pens, work GREAT for stamping!!


Saturday, 22 January 2011


Friday, 21 January 2011
American Apparel Giveaway!

UPDATE: The contest is open to international readers :)
I've made no secret of my undying love for American Apparel nail polishes. For a fledgling nail polish line, I think they've really hit the mark. I'm a big fan of creme finishes, which comprises all but 2 of their polishes (Echo Park & TopCoat/Basecoat), so naturally each and every one of these beauties has found their way into my collection, some I even have bought multiples of! (Cotton and Hassid, I'm lookin' at you!)
Well, in an exciting twist, the lovely people at American Apparel have offered me the chance to share my love of their polishes with YOU, my dear readers.
The lucky winner will receive a mix of 4 American Apparel polishes!
To be eligible:
1. Send me an email at thedailynailcontest@gmail.com with:
• your contact information (so I have it if you should win)
• whether you want to be included on the American Apparel newsletter email list (you can get discounts, sales, deals, and other information!)
• what you would do with 4 American colors if you had them (and which colors!)
2. Be a follower of The Daily Nail- whether on Twitter : @dailynail or here on the blog with Google Friend Connect - make sure you tell me which you follow with in your email! :)
3. If one of these things is NOT in the email, you will not be eligible to win this prize!
Contest entry deadline is Friday, January 28, 2011, at 11:59 p.m. Pacific Standard Time.
Looking forward to your emails! :)
Gold & Green Funky French
So to take a break from the Water Marbling, I decided to show you a funky french I did last week. Oh and before we get to this mani..............I BROKE A NAIL!!! Grrrr, I slammed it in a car door :( It broke my middle finger nail, down far!!! I'm debating on putting a fake on, or ljust letting it be, and grow out. I don't know, this sucks!! Okay, whew, rant over, now on to the mani. For this I used the brand 10, color #415 for the base, Ulta Urban Jungle for the tips, and Claires 14 Karats for the Konad.

This is 2 coats of the base, 10, #415


Then with the Konad on :)


And the final mani :)


A Patchwork mani with Across the Universe
Remember how I did a few manis using OPI Lincoln Park After Dark Matte??? Well here is another, lol.
I actually did this just for fun, when I had the OPI Deborah Lippmann, and black in my purse for like 2 days. I didn't wear this out, but just tried it to see how it would look. I actually really liked how it turned out, even though the black is kind of hard to see, oh well. I used Deborah Lippmann Across the Universe, Sinful Black on Black and OPI Lincoln Park After Dark Matte.


I actually did this just for fun, when I had the OPI Deborah Lippmann, and black in my purse for like 2 days. I didn't wear this out, but just tried it to see how it would look. I actually really liked how it turned out, even though the black is kind of hard to see, oh well. I used Deborah Lippmann Across the Universe, Sinful Black on Black and OPI Lincoln Park After Dark Matte.


Thursday, 20 January 2011
Color Blocked
I've always been a fan of simple, clean design, whether it be on packaging, in ads, or in architecture. I love interesting combinations of colors, and their applications in everyday life. Today's nail art design is based off of a tile pattern that I saw in an elevator when I was watching TV the other day. In this manicure, I used some french tip guides I received for review from Nailene. Since I rarely (if ever) do a french manicure, in addition to reviewing them (in the next few days) in the regular application, I wanted to see how else I could utilize them. I decided to use an X-acto knife to cut each straight guide in half, creating thin strips of nail stickers. To achieve the manicure you see below, I used those strips to create a grid and then painted in between the lines. As you can see, some polish seeped underneath, but I'm guessing that was since they weren't meant to overlap, and they started lifting at the intersections. In any event, I'm still relatively pleased with out it turned out.

I used American Apparel Cotton as a base, with American Apparel MacArthur Park, American Apparel Trenchcoat, American Apparel Port, China Glaze Flyin' High, American Apparel Raccoon, and Essie Alligator Purse. Topped it all off with 2 coats of Seche Vite top coat.
Disclosure: Some products in this post were provided by the manufacturer for review.